The last quarter of 2024 was a slow one. Several life events, some work obligations, a potential new business idea I might pursue long term, and the usual end of year family gatherings kept me from working on my game prototype as much as I could the months before. That’s why I’m doing a quarter wrap up this time.
Player height adjustment
I had not put any effort in player position and height before. That meant that if the player started seated in real life, but the in-game player was standing, the camera would be positioned at the in-game player’s belly height, leading to a weird perspective. I didn’t really bother during development, but as I finally wanted to start building a main menu, too, it was about time to take care of that and to prepare everything necessary to toggle between seated and standing gameplay and making the height adjustable.
The game starts with the in-game player standing, and my target platform, Meta Quest, uses floor level based tracking. So if I was expecting the camera to start at, say, 1.8m, due to the in-game player’s position, and I found the camera to be positioned at, say, 1.3m, I could reasonably assume that the real-life player was currently sitting and I had to account for the 0.5m difference by adding it to the camera’s position. With this adjustment in place, the initial perspective was as expected.
This change led directly into the next work item.
Main menu
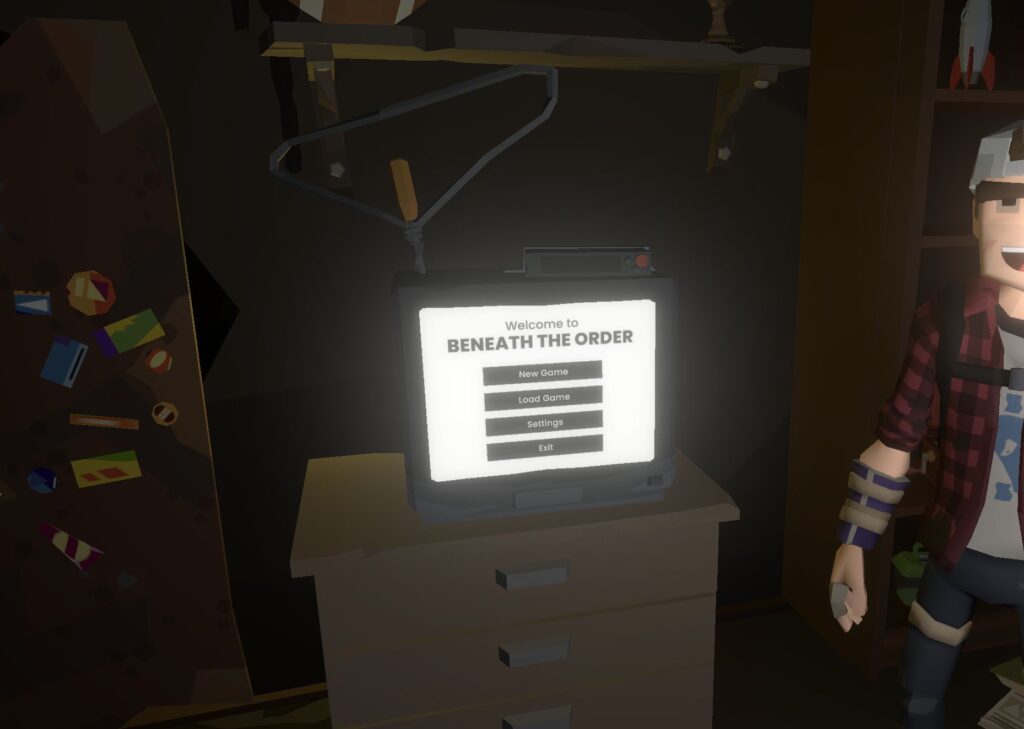
When the player starts the game, they usually interact with the main menu first. VR provides more opportunities than a regular flat screen game, and so I decided to make full use of it and integrate the main menu straight into the game start. Navigating through the menu is actually a part of the intro, and it happens on a TV which can be found at the player’s starting location.

The menu screens and controls are represented by a number of scene objects on a world-space UI canvas; I didn’t want to put any extra effort into separating the slightly curved screen display and the interactions.
Intro sequence / Procession
When the player leaves the main menu, they start interacting with the game world. This process serves as a simple tutorial, too: interactions, movement, and turning are taught within the first couple of minutes. Then, the player boards a sedan and is transported through the game world as various introductory events unfold. This procession turned out to be quite a challenge!
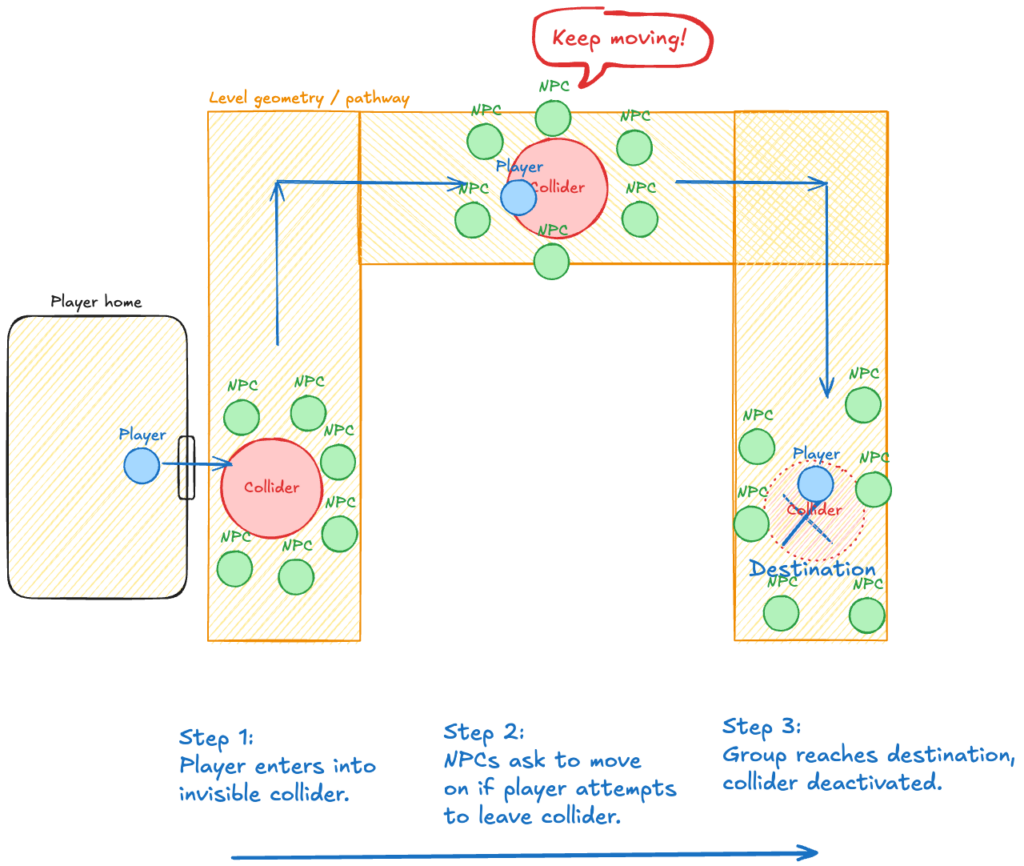
I started by drafting a simple sketch of what I wanted to achieve. Initially, I wanted the player to move “on their own feet” along with a group. The challenge was hindering the player from moving elsewhere, and in VR this was even more complicated and easily broke immersion. I thought about people moving around the player, forming a natural boundary, and a trigger collider where the player needs to stay in to keep the procession moving. Otherwise, the NPCs would encourage the player to move on.

But there was a challenge. The game world is actually much more complicated than the schematic and the group would have to maintain their position at any time to ensure there wouldn’t be any holes where the player could slip through. Doing regular NavMeshAgent-based pathfinding for every NPC was completely out of question, so I played with other options like one leader object following the path and the NPCs attempting to maintain position using interconnected spring forces. It didn’t go well.
I headed to the fantastic VR Creator Club for more ideas and the discussions there led me to an idea how one complexity could be removed entirely. Instead of letting the player move on their own, I could strap them into a sedan which is carried by the NPCs. This would limit movement in a plausible manner without breaking immersion completely.
This obviously brought new challenges. A sedan needs carriers in front and back and they need to maintain feasible positions while navigating the twisted, narrow alleys of the Lower Aegis, and the sedan needed to move realistically while remaining stable enough. I built a “rig” with carriers, a physics-based sedan, and fixed joints connecting the hands. Regular movement animations wouldn’t cut it any longer, since the carriers needed to be a bit more flexible, so I introduced ragdolls using Fimpossible’s Ragdoll Animator 2.
For movement, I started using NavMeshAgent-based functionality again, but this neither worked nor scaled well, particularly since I wanted to add more NPCs as ceremonial members. I needed more precise control over the NPCs’ positions throughout the ceremony. Instead of moving characters programmatically, I decided to use Unity’s Timeline feature to move the participants. This rendered regular movement animations useless, so I added Fimpossible’s Legs Animator, too.
I recorded the front carrier’s exact position using surface snapping. I couldn’t easily do the same for the back carrier, because the sedan was static at edit time and only became flexible at runtime. To ensure that the back carrier would also be on the ground at all times, I added a simple script which raycasts downwards from the back carriers center and positions him on the closest hit surface.
I chose the Black Guards as the sedan carriers. To create a stronger ceremonial and spiritual contrast while better reflecting the ceremony’s intent, I added monks carrying flags as part of the procession. The flags are animated using Magica Cloth 2.
This video shows both the in-game perspective of the player as well as the editor perspective. There’s still a lot of room for improvement but I am very happy with the outcome so far.
Vertigo is a recurring theme in the game, and I love how the procession enhances it. However, it’s not well-suited for people requiring certain comfort settings, so I may need to find an alternative for players who struggle with height and shaky movement.
All the runtime calculations for the ragdolls, feet movement, flag cloth, and sedan physics could actually be recorded into one big animation. And if I had that, I could remove all of the extra components and relieve the CPU significantly. The whole thing would always be stable and survive possible frame drops without going crazy/instable. I’ll leave that as an option for later!
Billboard
The next challenge was to convey some of the introductory elements during the procession. I decided to introduce a huge, floating billboard in the hollow core of the Lower Aegis.
During ceremonies, close-up shots of the speakers are projected to the billboard and the audio is broadcasted through the loudspeakers scattered along the alleys, so that everyone can witness the proceedings.
When not used for ceremonies, I wanted the billboard to serve as a propaganda tool for the mighty Eminents. I went to ChatGPT / DALL-E to generate a couple of fitting images. They came out reasonably well, but not all generated titles could be used, so I had to do some manual adjustments.
Dialogue update
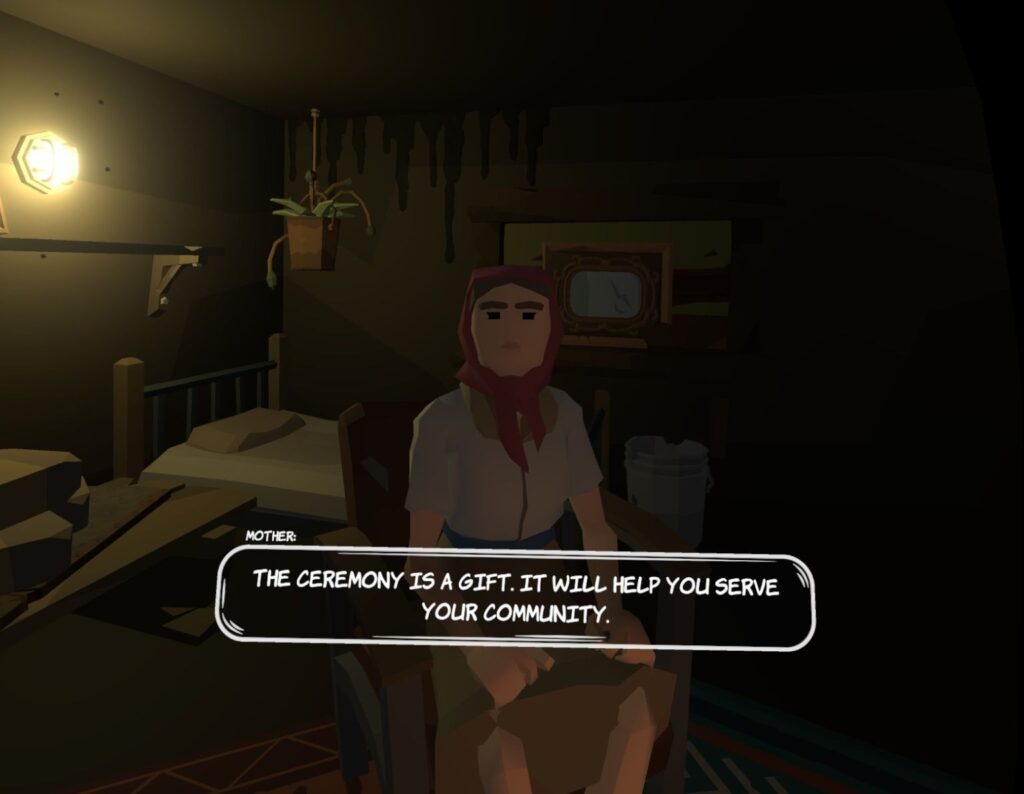
I decided to rework the dialogue once more. Instead of speech bubbles above the NPC’s heads, I decided to have a floating subtitle element which follows the player’s head movement. This allows looking elsewhere during a dialogue while still being able to read subtitles. To ensure that the text can be attributed to the speaker, it now contains the NPC’s name or description.

Performance
The larger the world grew, and the more NPCs were visible at once, the more performance became an issue. With parts of my world finalized and no further changes planned, I could finally begin optimization and evaluate which measures produced the best results.
I already had Perfect Culling integrated and running. I used it in other projects before and it always seemed to be working better than Unity’s native occlusion culling.
With several buildings laid out, I knew I could merge some of the modular meshes. Once merged, I could build LOD groups to reduce the rendered polygon count when seen from afar. I’m currently using these two assets from the same publisher, MT Assets:
- Easy Mesh Combiner to combine meshes. The mesh renderers of the original game objects are deactivated while other components like colliders remain intact. The merge can easily be undone and redone if changes need to be made. There’s more functionality available, like recalculating normals or copying UVs to other channels.
- Ultimate LOD System to generate various LODs. Again, actions can be undone and redone. The functionality can be disabled in editor. Pivot points from where to measure the distance to the camera can be defined.
Both assets allow storing generated meshes in a dedicated directory which I also put in version control. Both have a fair price, so if you have no such tool yet, I recommend checking them out. Just be aware that reducing mesh complexity for LODs without breaking them is a very hard task and it won’t work for every mesh. But most of the LOD generator assets use the same algorithm (freely available on GitHub) and ask ridiculous prices…
Rendering skinned meshes is very expensive, and I can’t really have more than 10-15 characters at once. I did some research on possible improvements, particularly since I want to have a crowd simulation to generate the feeling of a dense environment, and decided to try two things:
- Unity allows to decide which bones need to be exposed as game objects. I usually don’t parent anything to an elbow, for example, so this wouldn’t have to be available as a GO.
- I found an asset to simulate massive crowds called Mesh Animator. Since regular crowd NPCs shouldn’t do anything else than moving around, this could be worth a try.
Putting these measures in place is still on my todo list, though.
On top of this scene complexity, I had post-processing with two renderer features activated. The general consensus is that you can’t use post-processing on a standalone Quest application. With great regret, I decided to drop the Screen Space Cavity & Curvature renderer feature, which doesn’t even officially support VR but worked great for me; however, it’s only working in compatibility mode in Unity 6. I kept bloom for now, but I may have to look into more performant techniques than the Unity standard.
Unity 6 test
Finally, I wanted to see how the game worked with the newly released Unity 6. I enjoyed working with the preview version for a couple of other small projects and I wanted to settle on version 6 for the further development of the game. Also, my “middleware”, Game Creator 2, dropped Unity 2022 support, so it made sense to look into it.
Luckily, the upgrade worked without issues, so Beneath The Order is now officially a Unity 6 project.
I also took some time to move to Forward+ rendering path and try GPU Resident Drawer, but it gave me more headaches than any significant performance boost, so I abandoned it.
Game Creator 2 console
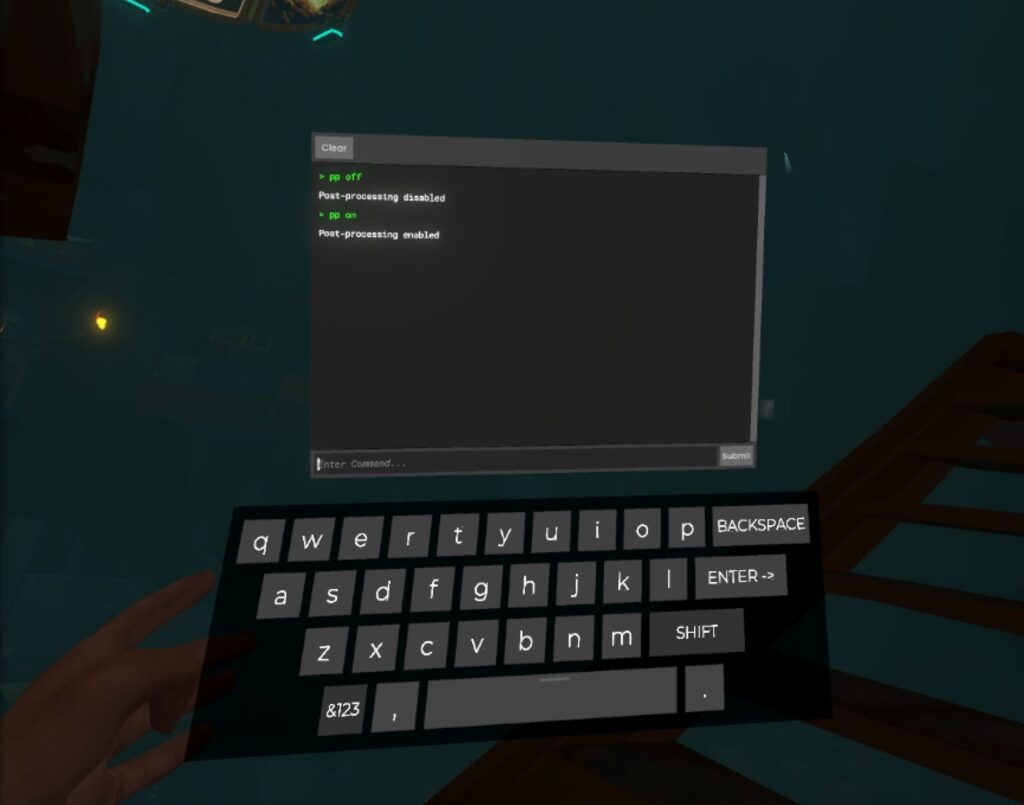
Another feature which was helpful for performance measurement and improvement, and generally any kind of debugging, was getting the native GC2 console into the game.
So far, I had been using VRIF’s own debug window, but I felt that the GC2 console was a bit more powerful. It even offers to easily extend it with own commands.
However, like many other GameCreator UIs, it wasn’t really meant to be used in world space or opened through different triggers, so I had to make some tweaks to the GC2 code.
I try to build my own extension versions of 3rd party components where possible, but sometimes I need to touch the asset code directly. In that case, I put the asset in source control, too, to see changes over time and to ensure I carry my own change across version upgrades.
The first command I created was one to enable/disable post-processing.

Résumé
Even though I didn’t post much for quite some time (shout out to my ex-colleague and fellow gamedev Ali who reminded me that I went quite silent), and even though I had a lot of other things to do, I got some things done. I hope this post shows how many things interlock and build on each other.
And 2025 started quite well, too. Stay tuned!

Leave a Reply